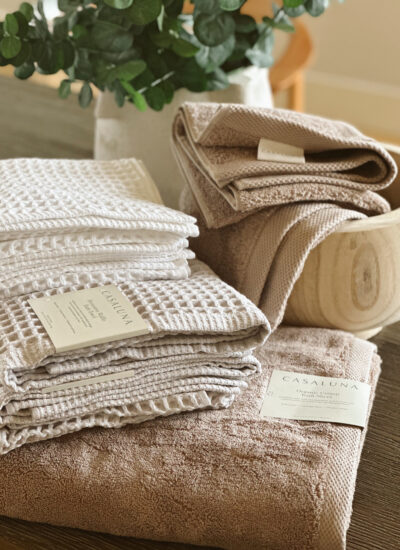
The Art of Towel Luxury: Casaluna Organic Towels and Waffle Towels Review I am so excited to talk with you about the art of self-care with the help of this Casaluna Organic Towels and Waffle Towels Review! We all know the importance of a luxurious bubble bath, a refreshing post-workout shower, ...

Artipoppe Review: My review of the $324+ luxury baby carrier
The popularity of babywearing continues to be very trendy–it's soothing, promotes bonding with your baby, and is ever-so practical. Artipoppe's baby carriers provide hands-free freedom without functional limitations but add to your aesthetic with eye-catching designs, unusual fabrics, and rich use ...
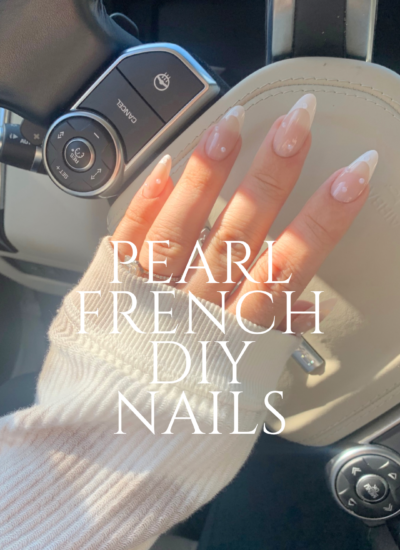
PEARL FRENCH TIP NAILS – DIY IN 10 MINUTES
How cute are these pearl french tip nails?! I first saw these nails on Kylie Jenner and thought they were gorgeous! They are the perfect mix of classic and feminine with a modern 2022 twist. I love the long almond nail shape, deep french moon, and delicate pearl accents. They stand out as beautiful ...
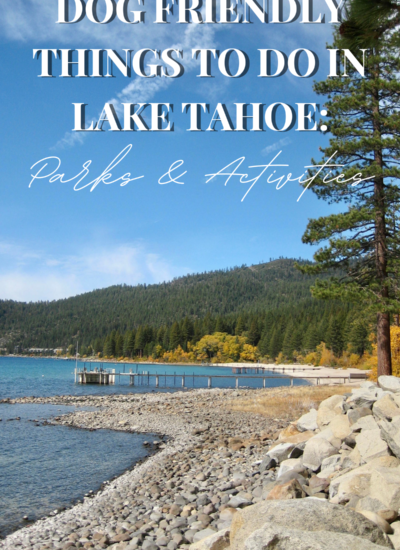
DOG FRIENDLY THINGS TO DO IN LAKE TAHOE: PARKS, BEACHES & ACTIVITIES
If you’ve been following my blog for a while, you know by now how much my family enjoys finding fun things to do with dogs in Lake Tahoe. And by the whole family, I mean the WHOLE family; Lola included. It's home to our beloved Tahoe-A-Frame and so many memories as a family. I love taking Lola to ...

DOG FRIENDLY RESTAURANTS IN LAKE TAHOE
If you guys read my last blog, you saw how many dog friendly activities, parks, and beaches there were in Lake Tahoe! So, now that you have something to do and somewhere to go, what about something to eat? Making a trip out to the lake can be tough especially when you’re leaving the pup behind. With ...
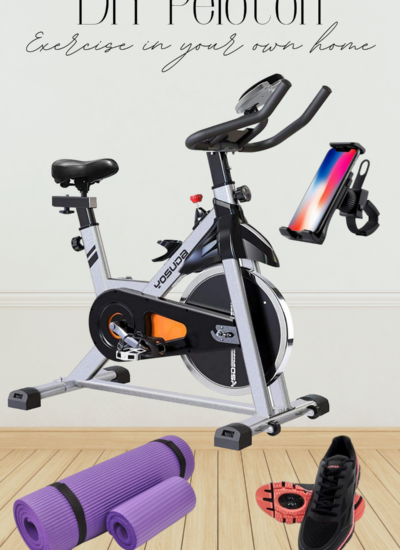
DIY Peloton Bike at Home
Quarantine has really given me a chance to focus on my physical and mental health, which is was way overlooked at the start of this year. Self-care and doing things for yourself are way too important to sleep on. I’ve been exercising as much as I can with yoga, walking, running, and my new obsession ...