Over the past few weeks I have gotten an overwhelming amount of comments, emails, tweets, smoke signals, and pigeon-grams (okay no, none of the last two types…) mentioning my hair, asking what I products I use and how I style it. First of all, thanks for all the hair-love everyone! I’m honestly blushing as I type this and am really flattered from all your comments. You guys definitely know how to make a girl feel good!
So lets get right into it. I’m going to share some of products and tools I use and walk you through my typical, everyday blowout.
Products
In all honesty, I really am not big into using hair products. Don’t get me wrong, I love the idea of them! I am advertising’s dream customer because I can’t seem to ever leave Sephora without picking up whatever is in the new, shiny packaging. But it seems like I tend to not use products because I like to keep my hair as clean as possible, or just forget to use them. But when I do, here is what I use:
Shampoo and Conditioner: My rule of thumb is to constantly mix up which shampoo and conditioner I’m using every day to keep any residue buildup from occurring in my hair. I do this for the same reason you don’t do the exact same exercise at the gym over and over–sometimes you just need to mix it up! I’m currently obsessed with the L’Oreal Elvive line which I discovered in London and immediately filled an entire suitcase with it, as evidenced by this embarrassing Instagram photo. My gym stocks the Kiehl’s shampoo and conditioner in the showers, so I’ll alternate between the two to keep my locks lively, shiny and residue free.
Leave In Products: When I remember to put in a pre-blowout thermal product, I like to use Kerastase’s Chroma Thermique Thermo-Shine which my amazing incredible stylist Brian recommended to me (he does the most incredible ombre hair color…LOVE!). Once I’ve finished my blowout, I like to add L’Oreal Elvive’s Nutri-Gloss Shine Spray (another London drugstore find) to get the world’s shiniest hair. But I need to go easy with just one or two spritzes because otherwise I’m breaking my own “keep thy hair clean” rule.
Tools
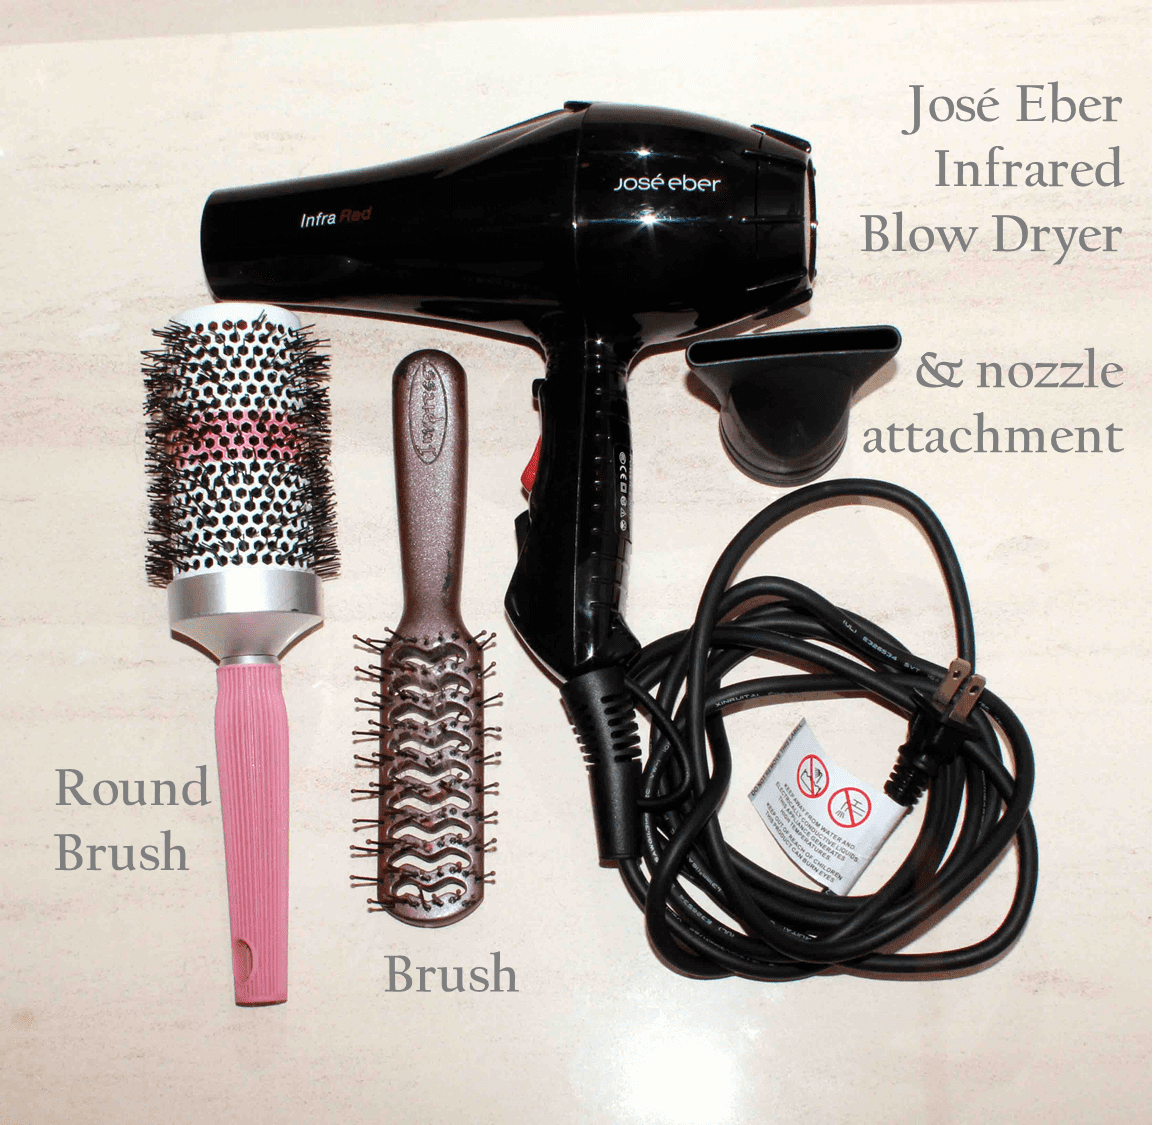
Since I have really thick hair, I have found it to be best for me to invest in top-quality tools to help make blowouts less laborious and more efficient. When blowing out my hair, I use a standard, typical brush to help ‘rough dry’ and detangle my hair. When my hair is closer to being fully dry, I’ll use a ceramic hollow round brush to help add body and volume. I’ve noticed that its best to use a round brush that is hollow to allow for airflow and better heat dispersion. But the biggest game changer I’ve found when it comes to drying my hair quickly and salon-blowout worthy has been in using the Jose Eber Infrared Blow Dryer. I’ve used tons of hairdryers in my lifetime and have yet to find one that dries my hair faster or makes it feel smoother. It has infrared technology which dries my hair incredibly fast. Before it used to take my 50 minutes to go from wet hair to styled hair, but now its only 20 minutes…sweet!
So since you asked, here’s a little step by step overview of my typical, everyday 20 minute blowout!
My tools of the trade

Step 1: Apply thermal protectant product throughout hair and gently brush out any tangles.

Step 2: My hair is crazy thick (It takes me five of the thick hair ties just to put it up into a secure ponytail) so I need to dry it in layers. Divide hair into a layer of the lower third of the hair and tie up the rest. Brush out any tangles.

Step 3: Rough dry hair until its about 80% dry. I use a brush to help me with this otherwise you can just use your fingers.

Step 4: Splitting the first layer into one to two inch sections, dry hair with a round brush in and outward direction (to increase body and volume) and concentrate on rolling the ends up into a soft curl. Repeat all throughout the first layer until hair its 100% dry and desired body/volume/curl is achieved.
 Step 5: Divide hair into second layer (so now two-thirds of the hair is down) and tie up the rest.

Step 6: Repeat the rough dry from before. I try to avoid letting the second and first layers intermingle so that I don’t have to dry it again but since I’m far from having the skills of a professional hairstylist, it doesn’t always work out as planned 😛
Note: My hair dryer does not breathe fire but rather, that orange glow is actually the super cool infrared light action which lets me sleep in an extra 30 minutes each morning. Score.

Step 7: Similar to before, round brush dry the second layer in an upward and outward motion to achieve body and volume and concentrate the brush on the ends to achieve curl.

Step 8: Release the remaining layer of hair and brush out one final time. (At this point I’m just glad to no longer be rocking that super cute wet bun look…)

Step 9: Last time, rough dry!

Step 10: Round brush the final layer.

Step 11: Once my hair is 100% dry, I like to go over the layered pieces a bit more with the round brush to really define the layers and add curl. At this point, I’m nearly done. I’ll do a quick upside-down head flip to open up my hair’s body, run my fingers through it and then let it fall as it may. 20 minutes flat and I’m done!

So now I want to hear from you! What is your go to hair product/tool/tip?
xoxo
Jennifer
Leave a Reply